Flushing Outboard Motor: The Easiest Way to Flush Your Engine (with Videos)
Flushing outboard motors is one of the easiest (yet powerful) ways to ensure the longevity of your engine.
A proper outboard engine flush clears the salt that builds up inside, which prevents corrosion.
However, what’s the best practice for outboard motor flushes?
If you’ve searched around, you might see mixed views on flushing outboard motors:
Some are pretty meticulous with the flushing and others just leave their engines in the water and only flush the outboards when it’s time for maintenance.
This post tries to gather all the useful information on flushing outboard motors to help you make your outboard motors last long (with tutorials on how to do the flush).
Table of contents:

Editor’s Note:
Always refer to the manual for the best way to flush and maintain your outboard motor. And the manuals are easily available online. This post provides general guidance on cleaning the outboard motor after use that suits most brands on the market.
Do Outboard Motors Need to be Flushed?
Do I need to flush outboard every time? Should you flush your outboard motor after every use?
The short answer is an absolute YES.
If you are using your boat in SALT WATER or BRACKISH water, you should flush your outboard with clean fresh water after EACH USE. It’s also recommended to flush your outboard EVERY SIX WEEKS when it’s been sitting in STORAGE.
Some people even flush their outboard motors after running in freshwater rivers or lakes. That’s because the environmental water has a lot of sediment in most places, and sometimes the outboard may touch bottom with mud and other debris trapped inside.
Not flushing outboard motors would cause the buildup of salt in your engine, which leads to blockages and finally results in overheating and corrosion. The issue doesn’t happen overnight but will occur over time.
You may hear a lot of experienced boaters claim that they don’t flush the motor and never run into issues, but it’s better to be safe than sorry.
Some of them are just willing to accept a shorter engine life for the convenience and cost savings of not hauling the boat out each time they use it and storage.
It’s essentially a trade-off between convenience with instant access and increased maintenance.
So in short, if you want to keep your outboard motor in its best condition, always remember to follow the manual and flush your outboard after every use if possible.
Tip: Quality outboards for saltwater uses, including ePropulsion motors, are built with internal and external zincs (also known as outboard anodes) to better handle metals in saltwater.
If there’s no way for you to flush the outboard after every single use, you can keep the motor submerged, so oxidization and salt buildup won’t be a big problem. That’s because salt buildup mostly arises when you pull a motor from salt water and then the water dries.
However, you need to make sure the anodes are in good shape and replace them as needed. That’s because there will be galvanic action which also promotes corrosion.
An occasional spray of anti-moisture products can also keep corrosion from forming on metal parts.
How Long Should You Flush an Outboard Motor?
So how long to flush outboard after saltwater to help rinse out the saltwater gunk?
Generally speaking, the process should last for at least 3 minutes. This gives the outboard motor flushing system plenty of time to keep fresh water through the engine for a nice clean.
And the more that outboard motor is used in salt water, the longer it needs to flush with fresh water, as soon as possible after use.
How soon after taking the boat out of the salt does it need to be flushed? How long can you leave an outboard without flushing?
It’s always best to flush the outboard motor immediately after running it to prevent salt from crystallizing in the cooling passages. But sometimes it just doesn’t work out.
Maybe you need to wait for a couple of hours’ drive back home or even the next day after a trip.
Is it too long to wait to flush?
If you are one of those who needs to flush the outboard hours (or days) later, no big worries.
You will be fine with it. Just give it a proper flush as soon as you can. If you are concerned about salt buildup, Salt Away is good to use occasionally to effectively prevent corrosion.
How to Flush an Outboard Motor? (with Video)
What’s the best way to flush an outboard motor?
Generally, there are 3 common solutions to flush your outboard. Take a few minutes to check out the outboard flushing procedures below.
Solution 1. Flush Your Outboard with Ear Muffs & Hose
Flush muffs are the most common and universal way to flush an outboard engine. That’s because the ear muffs for flushing outboard motors are cheap and easy to handle.
Here is how:
- Step 1. Attach ear muffs to the water intake on the outboard lower unit.
- Step 2. Attach a hose to the ear muff and turn on the water.
- Step 3. Run the engine at idle speed in neutral once there’s enough water flow.
- Step 4. Check if the water is coming through the tell-tale and keep it flushing for at least 3 minutes.
- Step 5. Turn off the outboard motor and then the hose.
Here is also a video tutorial to show you the procedure:
Note: If your motor has additional water intake valves, be sure to seal those intakes with tape to stop overheating. Also, be careful about using the high-sulfur well water to rinse your outboard, which would more easily cause buildup and deposit.
Exceptions: How to flush small outboard motors that don’t work on muffs?
Maybe you live in an apartment and do not have access to a hose. Or you have a small outboard motor and the lower unit isn’t large enough to accommodate the ear muffs. That way, you may consider using a big trash can or bucket and filling it with fresh water to do the job. Click to learn more.
Solution 2. Flush Your Outboard with Flushing Port
Some boaters prefer to flush engines with a flushing port. That’s because the engine doesn’t need to be running for the flush, which is helpful when the battery is dead or you want a quiet flush (or simply save some fuel).
Here is how:
- Step 1. Connect a garden hose to the port.
- Step 2. Turn on the water.
- Step 3. Flush the outboard motor for around 5 minutes.
Here is a video tutorial to show you the procedure (Start the video at 4:04):
Note: The flushing port is usually available on newer engines manufactured in the last 10 to 15 years. And the connection points vary among different brands. Check the manual for specifics.
Solution 3. Flush Your Outboard with Flushing Bag or Bucket
How to flush an outboard motor without a hose? What if your small engine couldn’t accommodate ear muffs and don’t feature a flushing port?
In that case, you will need to find yourself a flushing bag or bucket instead.
This flushing method allows for engine-on flushing while keeping the noise down.
Here is how to make it work:
- Step 1. Usually, you need to remove the propellers first before installing the flushing bags.
- Step 2. Fill the water bag with the attached hose (above the intakes) and keep the water circulating.
- Step 3. Start the motor and run the engine at a fast idle speed in neutral.
- Step 4. Flush the outboard motor for 5 minutes and make sure the water is flowing from the tell-tale.
Here is a video tutorial to show you the flushing procedure:
Note: You can also use products like Salt Away or Salt Attack occasionally (like every third or fourth time) to effectively clean the buildup and coat the cooling jacket to prevent corrosion.
Best Outboard Motor Flush Solution
The best way to flush outboard motors depends on your specific situation (as specified above).
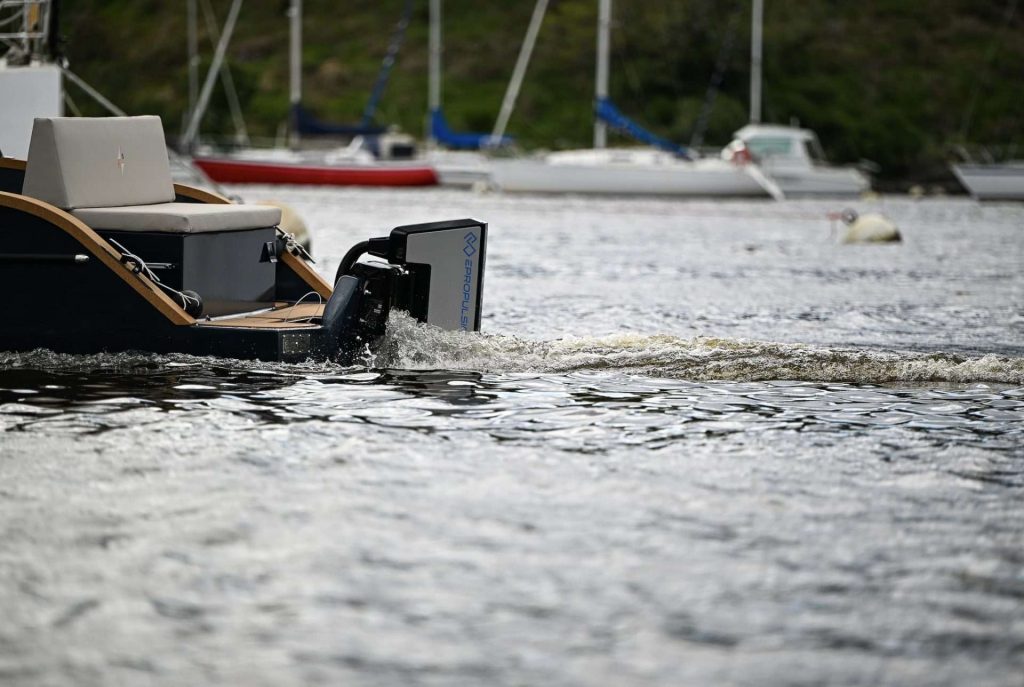
If you still find it hard to flush the engine, you may consider using an electric outboard motor to minimize maintenance and trouble.
Simply hose off. There are no water pump impellers there to flush. So much less worries.
Otherwise, just find an outboard motor flusher near you to get the job done.

FAQs About Flushing Outboard Engines
#1. How to flush outboard motors on mooring?
If your slip has a hose, you can just leave the outboard trimmed down, attach the hose to the flush port and turn on the hose. If not, you can use the flush bag method with the boat moored. Otherwise, you can use a water tank with a pump to rinse the outboard.
#2. How to flush outboard motors without freshwater supply?
The outboard motor flush can be a problem if you keep it at a slip without fresh water access. The easiest way to deal with it is to do a 12v pump with a water tank. The only problem is you will need to hoof 5-10 gal of water every time you use the boat. Or you could simply take a container of fresh water for flushing.
#3. How to flush an outboard motor when in the water?
There are days when you get back after the marina is closed and the boat doesn’t come out of the water.
No worries. You can still flush an outboard motor while in water. Here is how:
The best is to use a modern gravity flush port. That way, you can flush your outboard engine in the water effortlessly. All you need to do is connect the port with a hose and turn on the water.
Otherwise, you need to raise the engine to put the muffs on and attach the hose, then lower the engine, turn the hose on full blast, and start the engine. No worries. The fresh water from the hose will not allow any salt water in as long as the water is running, since the hose pressure is far greater than the water pressure. After that, raise the engine again and have a quick rinse down of the engine.
If you find it difficult in your situation, you can just flush the motor with the engine tilted out of the water and the muffs on. It is always better than not flushing.
#4. Can you flush an outboard without it running?
Yes, of course. The flushing port method allows you to flush an outboard motor without running it (in some cases, you shouldn’t run it).
#5. How long to flush outboard with Salt Away?
Usually, products like Salt Away can flush salt from your outboard in less than 1 minute.